
(Image source: https://c2.staticflickr.com/4/3477/3758948453_9139769601_z.jpg?zz=1)
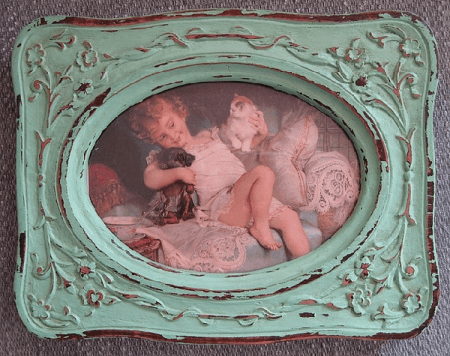
Refinished frames have a lovely aged look about them that not only adds a soft vintage charm to your home interiors but also looks great in virtually all styles of decor.
Old frames can be bought for a little more than nothing from thrift stores, yard and garage sales, flea markets and church sales. Take some time out on weekends and browse through to find some great frames for the perfect refinishing job.
Refinishing a frame will ideally take no more than a few hours. You will end up feeling happy about bringing back a fabulous piece to life which would otherwise have gone to waste.
There are several steps involved in getting a perfect-looking refinished frame. And the first one is bringing home the right frame for the project.
Here are a few tips you can keep in mind when starting out with your refinishing project.
Do not search for the Best Frame
Since you are on a refinishing job you can afford to overlook the minor dents, chips and scratches that you spot on the frame. All these will be practically invisible after you are done with your refurbishing and will in fact add to the unique look.
Chipped or broken glass can be replaced, but a point to note is that differently shaped glasses are higher priced and will cost you more than the regular square or rectangular ones. So when you are out shopping remember that the beautiful oddly-shaped frame will be quite expensive to refinish as compared to the more regular-shaped ones.
Wood Is Your Best Option
Wooden frames look great after they are refinished. Wood is also easy to work on and refinish.
All types of wood whether raw, matted or unfinished will suit perfectly well. When you sand the corners and the ridges, the wooden frames acquire a wonderful distressed look.
So when you are out shopping what you need to look for are chunky wood frames with plenty of detailing.
It is not just the frame that you need to pay attention to. The back of the frame is also equally important. If it is made of wood it will be easy for you to attach hanging hardware like wires and hooks.
The Less Desirable Options You Have
Metal and ceramic frames are not easy if you are looking at a DIY project. There are several laborious steps involved including the difficult task of removing existing paint and rust.
You will also find it difficult to attach hanging hardware to metal frames.
You will also do well to stay away from enamel and glossy finishes because it is very difficult to work in a distressed look. Giving a new finish to these frames will be an uphill task for you.
Laminate frames are also not recommended because they are easier to repaint than refinish.
Sand Away
The first step involved in refinishing is to give a proper sand down to the frame with a fine grit sand paper.
You need to sand thoroughly but remember to keep the rounds, ridges and all the detailing intact.
Once you are done with stripping away the original finish you have a virtually new frame to work on.
Easy Quick Fix for Dents and Chips
The dents and chips in the wooden frame may seem bothersome but you can fix them easily.
The slight scratches and dents can be covered by a dark acrylic paint. It will fill in the scratches and virtually make them invisible.
Tackle the Bigger Dents
For starters you need to clean up the frame thoroughly. You can use an oil soap like Murphy’s to remove stubborn dirt buildup and accumulated grime. Dry the frame and assess the extent of the fill-up job you have on hand.
Use wood putty to build up broken areas and fill dents and pits. You will have to be patient and wait for the putty to dry and adhere before smoothing on a fresh piece.
The chipped corners can be evened out with wood glue. There may be some ornate pieces or attachments that have come loose. Check them properly and use wood glue to fix them in place.
Next Step Is to Paint
Before you splash on the paint give a light sand over to the frame so that the paint will adhere properly.
You can use any paint in two shades so that one colour will be seen through at places when you are done with your distressing/refinishing. Here we are using paints in black and white colours. You can go for either latex or acrylic paint.
Apply a generous coat of black paint on the frame and wait for it to dry.
Use Wax or Vaseline for the Perfect Refinished Look
You need to rub on candle wax or Vaseline over where you want the first coat of paint to be visible. This will prevent the subsequent white coat of paint from sticking too strong to the base coat.
Apply a generous amount of wax or Vaseline petroleum jelly over the ridges and corners, and the ornate areas.
Time for the Top Coat
When you are done with applying the wax, it’s time to put on the top coat of white paint.
Allow the paint to dry completely.
Now carefully rub with a fine sand paper the areas where you have wax beneath. Do so carefully so that you do not remove the underlying coat of paint. The more you sand it the better is the refurbished shabby chic look that you get. Sand it until you are pleased with the look your frame has got.
Seal the Look
The final step is to give a protective coating with clear polyurethane. You can have the clear finish in gloss, semi-gloss or satin sheen. Alternatively you can also use wax to seal in the paint. You can go to the nearest Sydney frame shop and do the final few touch ups before slipping in your family pic.
Conclusion
Refinished frames are a great way to get a chic interior on a happy budget. Refinished or distressed frames sell for big money in decor stores. But with a few hours well spent you can get one for a few dollars or even less. So have fun refinishing!